Tuesday, March 15, 2016

New: HTML CloudBooking/CloudForms Update!

With the latest version of StudioCloud we have rebuilt and redesigned the CloudBooking to be html based so that it can be accessed from any browser based device such as a smart phone, ipad, tablet, or internet browser.

The New Integration Options
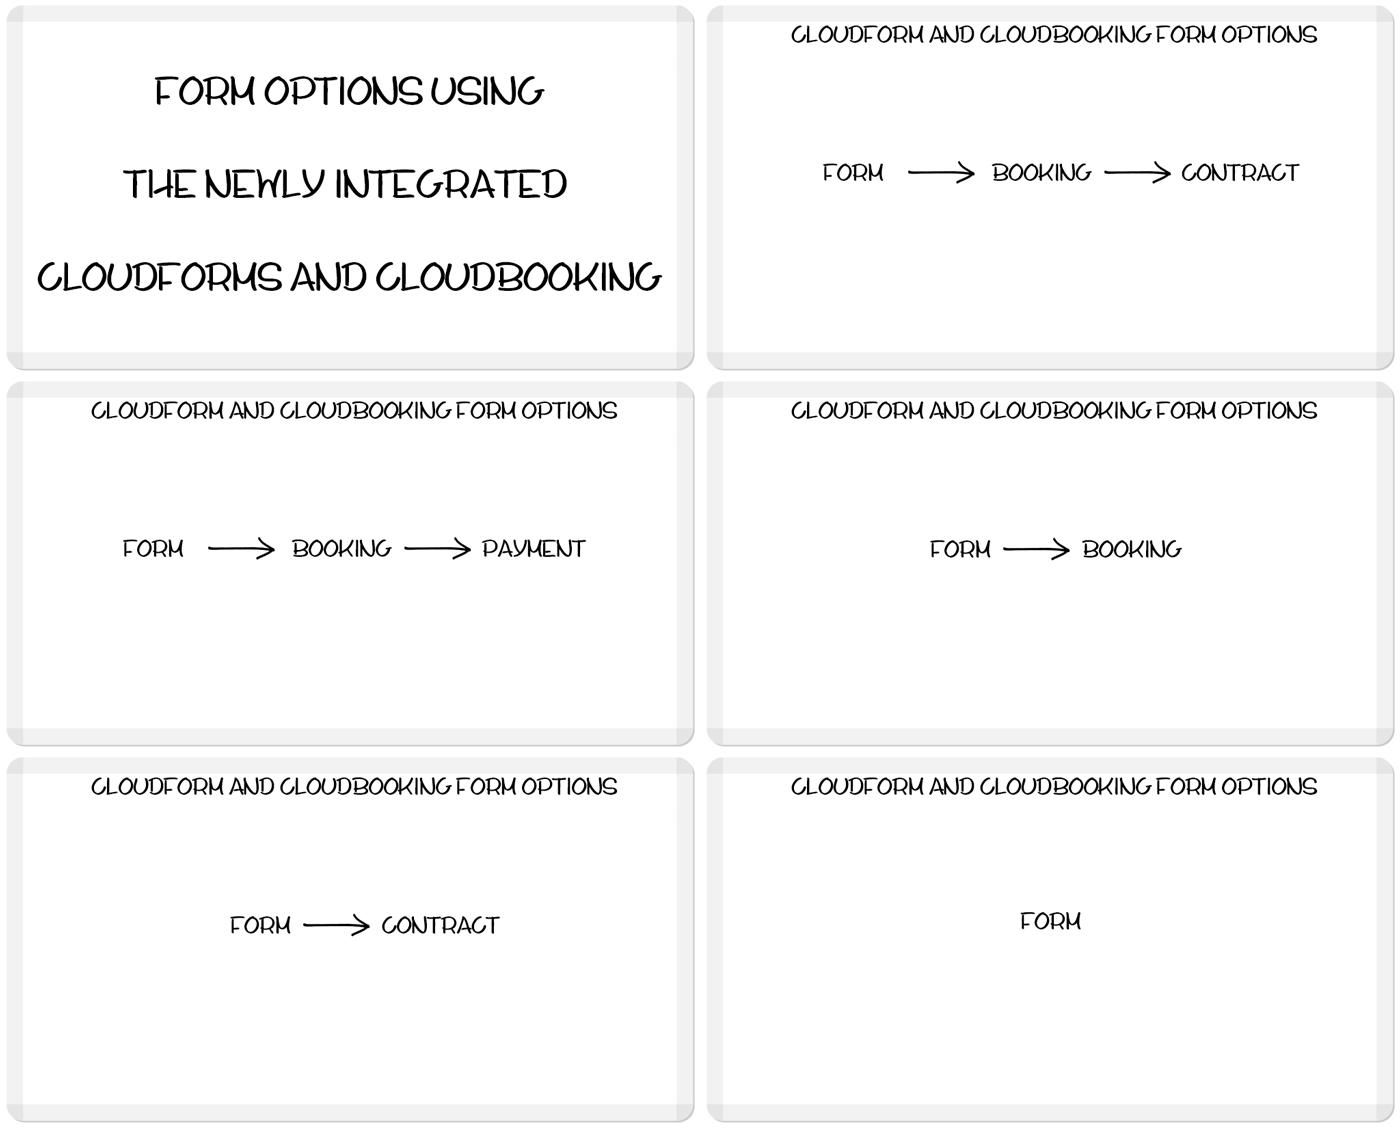
In addition, we have also integrated the CloudBooking directly into the CloudForms. This powerful new integration lets you create unlimited forms where each form can have a unique online booking scheduling system associated with it.

On top of the above features we have also integrated invoice creation, contract signing, and payment options into the forms as well, which provides even more seamless CloudForm options.

In addition, when a client pays a deposit or makes a payment in a CloudForm their credit card will automatically be saved so that you can, if you so desire, setup a payment plan that will automatically charge their saved credit card on the desired plan dates.


CloudForm Examples

Do you have a situation where you want to run a special with a lot of short term photo shoots and have the clients pay ahead of time? 

No problem. Just create a CloudForm for it and send it out in an email blast to your clients. Whether they are on their computer, phone, or tablet they will be able to book a session and pay for it right then.

Do you want to be able to send a form to a prospective wedding client, have them fill out the form to collect information for the wedding, schedule the wedding date from the form, eSign the wedding contract, pay a deposit for their wedding, and setup a payment plan to automatically charge their credit card for the rest of their balance due?

No problem. You can utilize any combination of these features depending on your processes. Just create a CloudForm and set it up either with a pre-selected wedding package or a list of wedding packages they can choose from. Then select to either have a payment entered as a fixed amount regardless of the package or as a percentage of the total package amount they selected. Finally select which contract you want to have sent to the client when they fill out the form.

To add in a payment plan all you need to do is edit the invoice that was automatically created for the client when they filled out the form and follow the instructions at the bottom of this blog post to add a payment plan to the invoice.

The credit card they used to fill out the form was automatically saved for you so you can, if you want, use that credit card for the payment plan.

Do you need to book different sessions on different days?

No problem. You can create one form where the client can select their desired session or you can create two different forms with the desired session locked into each form. If you need different information for each session then creating two different CloudForms is the way to go.

Do you have a situation where a customer wants to book a specific photographer?

No problem. Just create a CloudForm for just that photographer or, if you want, for all of the photographers and have the client select their desired photographer. If this is a situation that is only done on a pre-request basis just create an email template with the CloudForm link in it and email the CloudForm to a client whenever it is requested.

Do you want to schedule a client on your calendar from your iphone internet browser?

No problem. Just create a CloudForm just for you and bookmark it in your iphone internet browser. Then just pull up that page and fill out the form. It will only let you book sessions when you are available so you don't even need to look at your calendar.

Do you want to hand a client an iPad and have them confirm their information, select a package and have them pay for it on the iPad?

No problem. Just create a CloudForm for it and book mark it on the iPad's internet browser. Then just hand the iPad to the customer and they can fill out the rest.

Do you want to do all of the above items at the exact same time?

No problem. You have unlimited forms and the ability to schedule in all of the above manners as well as many more.

How Do You Get Started

To add invoice creation, payment/deposits, or online booking to a form create a new form or edit an existing form and click on the actions tab followed by the "Add Invoice, Payment, Online Booking" button.

This will open a window which will allow you to customize the invoice, payment and online booking options as well as the wording and look and feel of the online booking fields.

Tutorials

Click here for a tutorial on how to create cloudforms.

Click here for a tutorial on how to add the html online booking to a cloudform.

Click here for a tutorial on how to setup payment plans to automatically charge a saved credit card.

Monday, February 1, 2016

Update: CloudForms


With the latest version of StudioCloud we have added quite a few new updates and improvements to the CloudForms. Make sure to get the latest update when launching StudioCloud or go under Settings and click on 'check for updates'. Please note that current customers will not be affected by any of the changes unless they edit the form.

For those of you who don't currently use CloudForms, they can help you collect important information before an appointment, capture and convert leads, and gives you the ability to have your clients digitally sign contracts. 

The CloudForms have been updated to support fonts, font colors and text box colors. Below are sample contact us forms with different font and color setups. The forms with the white background are transparent, so if you embed them in your website the background color will be the same as your website.


The CloudForms form creation interface has also been updated to support dragging and dropping of components to sort them. Below are examples of the clicking to sort method and the dragging and dropping to sort method. Both methods are now supported.

Dragging and dropping to sort


Clicking to sort

Here is a complete list of the new and updated CloudForm features in the latest version of StudioCloud:
  • User Interface Changes
    • The addition of descriptions in the form creation interface to answer common questions.
    • The fields management section in a form now has the entire window space height to make it easier to sort and organize the fields.
    • The fields in a form now support drag and drop reordering as shown above.
    • The client fields now tell you where the information will be saved in StudioCloud. For example, the first name field tells you when you create or edit a component that the information added to the field will be added to the client first name field in StudioCloud.
  • Customer facing form changes
    • The forms now support choosing from 14 different browser supported fonts
    • The forms now support changing the form text color either by selecting the color from a list or by entering an html hex color.
    • The forms now support changing the input form background color either by selecting the color from a list or by entering an html hex color.
    • The label field has been updated to support two different widths
    • A line break field has been added in to support spacing in the form.
    • An html link option has been added in allow the client to click on a link and have it open a new tab. 
      • This is useful for situations where you want the client to view a page such as your terms of use policy but you don't want the client to leave the form.
    • An html link option has been added in to allow the client to click on a link and the client will leave the form and go to a different webpage. 
      • This is useful if the client is filling out the wrong cloudform and you need to have them leave the form and go to a different web link.
    • The 3 new custom fields in StudioCloud are now supported in the CloudForms.
      • To receive this feature please update to the latest minor release by going to settings and clicking on the "show major and minor releases" then clicking update.
  • Actions after the client fills out the form
    • The forms now support having a client automatically tagged when they fill out a form for future marketing purposes.
    • The forms now support having a client pipeline automatically assigned to a client for lead tracking. Client pipelines must be enabled to view this option when creating a form.
    • The forms now support selecting whether a client will be added to StudioCloud as a client, prospective client, or lead


Tuesday, January 19, 2016

New: Setup Wizard

Setup Wizard


StudioCloud has added a new Setup Wizard which steps customers through the setup process step by step.

If you are a new StudioCloud customer the setup wizard will automatically open the first time that you login. If you are an existing StudioCloud customer you can open the setup wizard by going to settings and clicking on the "Setup Wizard" button.

Monday, January 18, 2016

Feature Update: Pipelines

Pipeline Updates

Note: The following changes do not affect current customers with the only exceptions listed under "Current StudioCloud Accounts".

New Features

StudioCloud has added in the ability to hide and show different types of pipelines depending on how your business manages its workflow.

Changes To Current Features

Previously, StudioCloud allowed client pipelines, event pipelines, and invoice pipelines to be displayed as an option for a project. To reduce complexity StudioCloud now only allows new pipelines to be attached to their respective resource. Below is a breakdown of the new changes.
  • Project Pipelines are only used to track the status of a project
  • Client Pipelines are only be used to track the status of a client. 
    • Client Pipelines can no longer be used to track the status of a project
  • Event Pipelines are only be used to track the status of an event.
    • Event Pipelines can no longer be used to track the status of a project
  • Invoice Pipelines are only be used to track the status of an invoice.
    • Invoice Pipelines can no longer be used to track the status of a project
  • Job Pipelines are only used to track the status of a job.
  • Task Pipelines are only be used to track the status of a task.
Current StudioCloud Accounts

If a StudioCloud account already has a pipeline workflow in place the above changes do not apply. In other words, current StudioCloud accounts are unaffected by the above change except for in the following exceptions:
  • If a current customer is not seeing their preferred pipelines they need to go to the link below and enable their pipeline
  • If a current StudioCloud account creates a new pipeline the above changes apply.
  • If a current StudioCloud account needs to edit an existing pipeline the above changes apply.
    • They will simply need to change their client, event, or invoice pipeline to be a project pipeline
StudioCloud Tutorials


Feature Update: Tags

Client And System Tags


StudioCloud has previously offered a system to track clients, events, invoices, bookkeeping, projects and tasks using tags. With the latest update of StudioCloud still offers the exact same solution but we have conceptually divided the tags into two different categories. Client Tags and System Tags. Below is a definition for both of them.

Client Tags: Client tags are used to group clients for various reasons such as marketing purposes, quickly contacting them by email or text, reporting purposes, etc. Clients support unlimited tags.

System Tags: System tags are used to group resources such as events, invoices, bookkeeping, projects, and tasks for reporting purposes. A combo box with the label of tag is shown when system tags are enabled. Resources only support one system tag per resource.

By default a new StudioCloud account will have the system tags disabled to reduce the initial complexity of the StudioCloud program. Current StudioCloud accounts will, by default, have the system tags enabled.


New Feature: Custom Fields

Custom Client Fields


StudioCloud now supports up to 3 custom client fields in the new and edit client window. These fields can be used to store any information regarding a client that you want. In addition, the client fields label's can also be renamed. For example, if you want to save a client's fax number you could rename the "Custom Field 1" to be "Fax" and then record the fax number.

The Custom Field's are also display in the client tables as well but must be first selected from the "View Columns" menu option.


New Feature: Custom Client Windows

Custom Client Windows


StudioCloud now supports customizing the client, prospective client, and lead windows to display only the fields that you use. The above image shows a few sample examples of new client windows that have been customized.